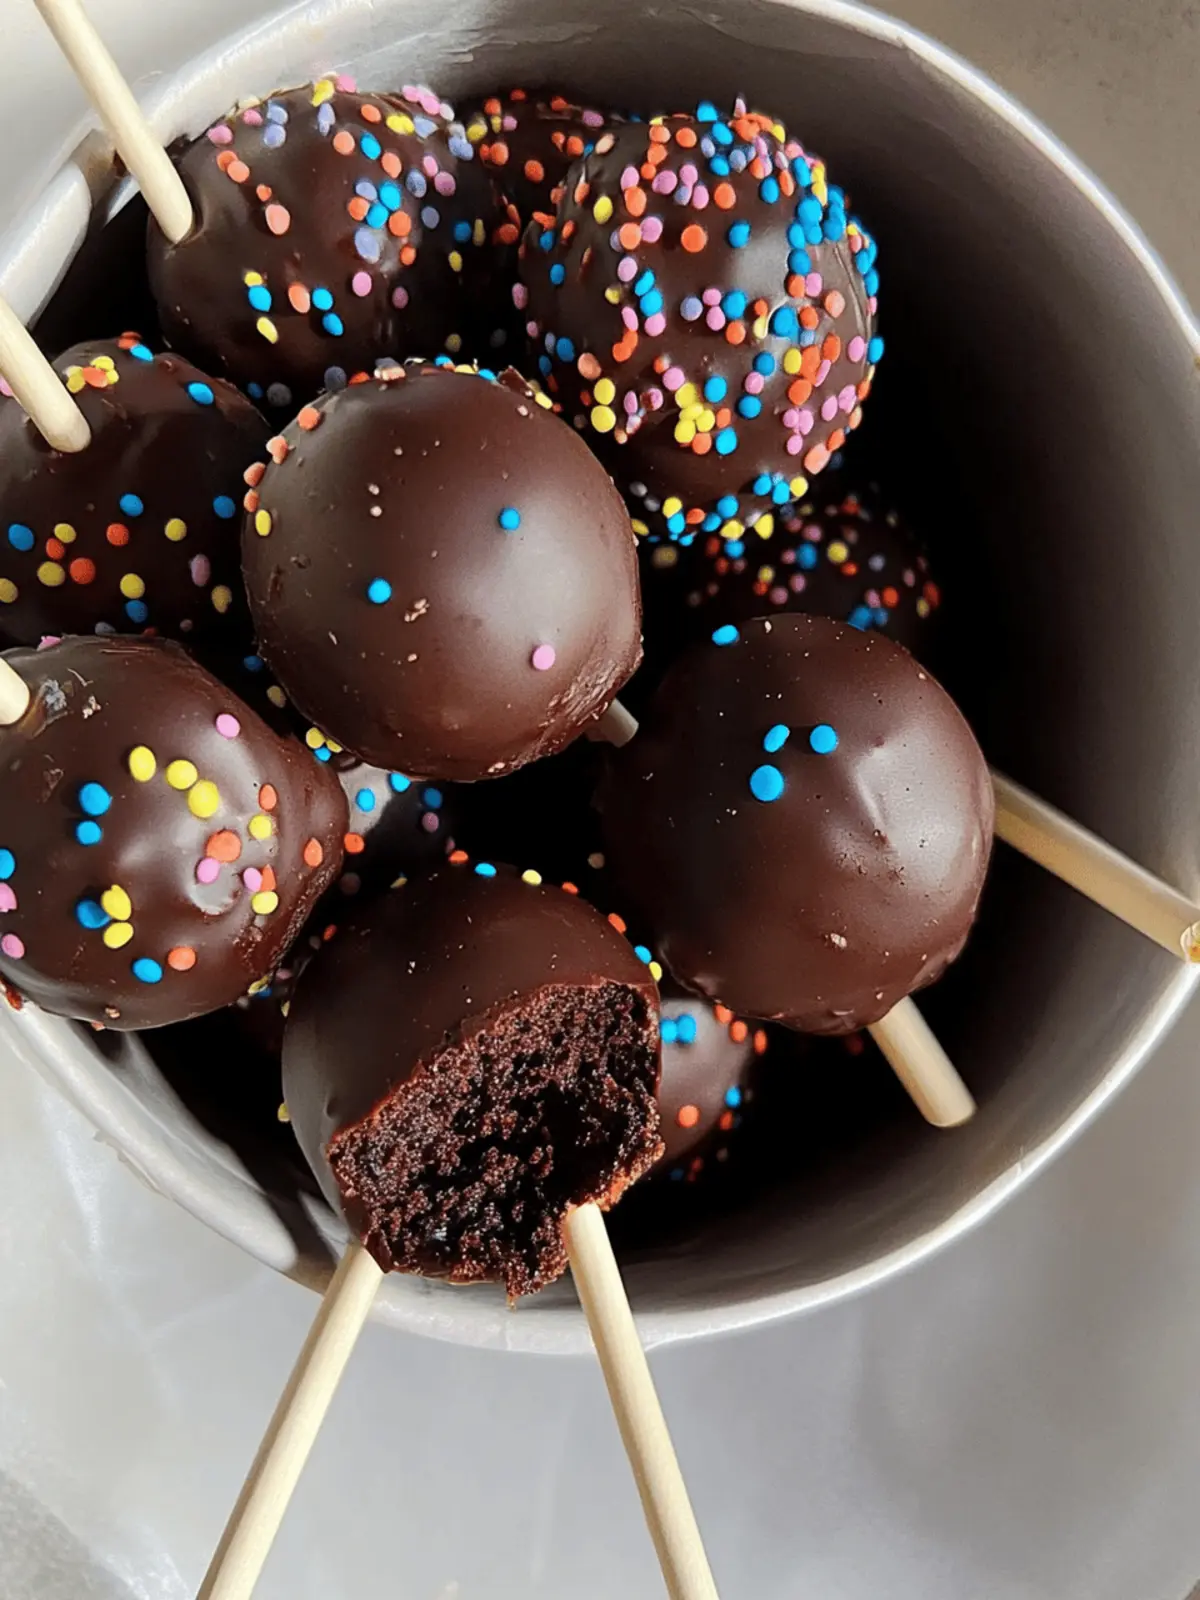
There’s something incredibly satisfying about turning a simple cake mix into a whimsical treat that delights everyone, don’t you think? I discovered the magic of Chocolate Cake Pops on a rainy afternoon, when I needed a fun project that also silenced my sweet tooth. These chocolatey bites are like little party favors on a stick, perfectly crispy on the outside and fudgy on the inside.
What’s fantastic about this recipe is its sheer simplicity; with just a box of cake mix, a few essential ingredients, and your imagination, you can whip up these delectable treats in no time. Whether it’s a birthday bash, a cozy gathering with friends, or just a Tuesday night craving, these cake pops are sure to impress. Plus, they’re a wonderful way to get creative—you’re free to add sprinkles, nuts, or even swap out the chocolate for something a bit more colorful. Let’s dive into making these irresistible little gems!
Why are Chocolate Cake Pops so irresistible?
Simplicity at its Core: These Chocolate Cake Pops are incredibly easy to make, requiring no extensive baking skills—just mix, shape, and dip!
Irresistible Flavor: The rich chocolatey goodness of the cake, paired with a crunchy shell, strikes the perfect balance that chocolate lovers crave.
Fun for Everyone: Kids and adults alike will adore these whimsical treats, making them perfect for celebrations or as a sweet afternoon indulgence.
Customizable Delights: Get creative by experimenting with different cake flavors, coatings, or toppings like crushed nuts to truly make them your own!
Time-Saving Treats: In just under two hours, you’ll have a crowd-pleasing dessert, giving you more time to enjoy the festivities.
Perfect for Gifting: Package them up for friends and family as charming homemade gifts—everyone loves a sweet surprise!
Chocolate Cake Pops Ingredients
For the Cake
- Chocolate Cake Mix – A 15 oz. box is perfect; feel free to use any brand you love for your Chocolate Cake Pops.
- Water/Oil – Follow package instructions; substitute water with milk for a richer flavor.
For the Frosting
- Salted Butter – Adds delicious richness; opt for unsalted if you prefer to control the saltiness.
- Plain Cream Cheese – Gives a creamy texture to the frosting; mascarpone or a nondairy alternative works well too.
- Vanilla Extract – Use pure vanilla for an enhanced flavor that rounds out the sweetness.
- Powdered Sugar – Adjust the amount according to your sweetness preference and desired frosting texture.
For the Coating and Decoration
- Chocolate Melting Wafers – Ideal for coating; ensure they melt smoothly for that perfect crunch.
- Sprinkles – Totally optional but highly recommended for added visual appeal and fun texture!
How to Make Chocolate Cake Pops
-
Bake the Cake: Preheat your oven and bake the chocolate cake mix according to the package instructions, using milk instead of water for a richer taste until a toothpick comes out clean.
-
Cool the Cake: Once baked, let the cake cool completely on a wire rack. This step is crucial as warm cake can be too moist when crumbled.
-
Prepare the Frosting: In a bowl, mix softened salted butter, plain cream cheese, vanilla extract, and powdered sugar until creamy and smooth—this will enhance the flavor of your Chocolate Cake Pops.
-
Crumble the Cake: In a large bowl, crumble the cooled cake into fine pieces. Mix in about 1 cup of frosting until combined—you want a dough-like consistency that holds together well.
-
Chill the Mixture: Cover the bowl and chill the cake mixture in the refrigerator for 30-45 minutes, allowing it to firm up for easy rolling.
-
Shape the Balls: Roll the cake mixture into 1.5 tbsp balls and place them on a parchment-lined baking sheet, making sure they are evenly spaced.
-
Melt the Chocolate: In a microwave-safe bowl, melt chocolate wafers in intervals, stirring until smooth. This will be the delicious coating for your pops.
-
Assemble the Pops: Insert sticks into the chilled cake balls. Dip each ball into the melted chocolate, ensuring it’s fully coated, then add sprinkles if desired before the chocolate sets.
-
Chill Again: Place the dipped cake pops back on the parchment-lined baking sheet and chill for another 30-45 minutes, or until the chocolate has hardened completely.
Optional: Drizzle melted white chocolate on top for an elegant touch!
Exact quantities are listed in the recipe card below.
How to Store and Freeze Chocolate Cake Pops
Room Temperature: Store in a cool, dry place for up to 2 days; however, the chocolate coating may soften.
Fridge: Keep in an airtight container for up to 7 days. This helps maintain freshness while ensuring your Chocolate Cake Pops stay deliciously moist.
Freezer: For longer storage, freeze the cake pops for up to 2 months. Wrap each pop in plastic wrap before placing them in an airtight container.
Reheating: There’s no need to reheat; simply enjoy them straight from the fridge or freezer for a delightful treat whenever you crave something sweet!
Chocolate Cake Pops Variations
Feel free to explore and personalize your Chocolate Cake Pops with these fun and tasty twists!
-
Flavored Cake Mix: Experiment with red velvet, lemon, or vanilla cake mixes for unique flavors that surprise your taste buds.
-
White Chocolate Coating: Swap the chocolate melting wafers for white chocolate for a sweeter and creamier coating experience.
-
Nutty Addition: Roll your pops in crushed nuts like almonds or hazelnuts for a delightful crunch that complements the soft cake inside.
-
Coconut Coating: Roll the cake pops in shredded coconut for a tropical twist that adds both flavor and texture to your bites.
-
Spicy Kick: Incorporate a pinch of cayenne pepper into your frosting for an unexpected, warm heat that tantalizes the palate.
-
Dairy-Free Alternative: Use a dairy-free cake mix and coconut cream in place of cream cheese for a vegan-friendly treat everyone can enjoy.
-
Zesty Orange Flavor: Add a teaspoon of orange zest to the frosting for a bright, citrusy flavor that complements the chocolate beautifully.
-
Pretzel Crunch: For a salty-sweet treat, dip your cake pops in crushed pretzels before the final chill—it’s a fun textural contrast!
Expert Tips for Chocolate Cake Pops
-
Chill Time Matters: Chill the cake mixture thoroughly to ensure it holds its shape when rolling into balls. A firm mixture makes perfect Chocolate Cake Pops.
-
Crumble Right: Allow the cake to cool completely before crumbling; warm cake can lead to overly moist cake pops that won’t hold together.
-
Melt Carefully: When melting chocolate wafers, do it in short intervals, stirring often to avoid burning. If they harden, you can always remelt them.
-
Decoration Options: Don’t hesitate to get creative with toppings—try crushed nuts or coconut, or use colored melting chocolate for a fun twist!
-
Quality Counts: Choosing high-quality melting chocolate makes a significant difference in flavor and texture; your guests will notice the love you put into your Chocolate Cake Pops.
What to Serve with Chocolate Cake Pops?
These delightful treats are not just a sweet finale; they can accompany a variety of other dishes to create a memorable meal.
-
Rich Hot Chocolate: The deep, chocolatey flavor complements the cake pops perfectly, offering a cozy hug in a mug during chilly nights.
-
Fresh Strawberries: Their natural sweetness and slight tartness create a refreshing contrast that brightens the rich, fudgy pops. A delightful palate cleanser!
-
Vanilla Ice Cream: Creamy and vanilla-scented, the ice cream pairs beautifully with the chocolate, enhancing the dessert experience and adding a delightful temperature contrast.
-
Fruit Platter: A colorful array of seasonal fruits brings freshness to the table, balancing the indulgent sweetness of the cake pops with vibrant flavors.
-
Coffee or Espresso: The rich, bitter notes of coffee enhance the chocolate flavors, making it a perfect after-dinner accompaniment. A classic pairing that never fails!
-
Milkshakes: Opt for chocolate or vanilla for a nostalgic treat. The creamy texture adds a fun twist and is sure to please kids and adults alike.
-
Cheesecake Bites: Mini cheesecake bites offer a creamy and tangy counterpart, making for an indulgent dessert trio that guests will rave about.
-
Nutty Trail Mix: A crunchy side with roasted nuts and dried fruits gives a wholesome touch and a delightful texture that contrasts with the soft cake pops.
-
Chocolate Fondue: For an interactive dessert option, serve mini skewers to dip the cake pops into warm, melted chocolate. Extra chocolate? Yes, please!
Make Ahead Options
These Chocolate Cake Pops are a fantastic choice for meal prep enthusiasts looking to save time during busy celebrations! You can bake the chocolate cake up to 24 hours in advance; just cool and refrigerate it in an airtight container to maintain its moisture. The frosting can also be prepared ahead of time and stored in the fridge for up to 3 days. When you’re ready to assemble, crumble the chilled cake and mix it with the frosting, rolling them into balls and chilling again for 30-45 minutes. This way, you can enjoy delightful, homemade chocolate cake pops with minimal effort right before serving!
Chocolate Cake Pops Recipe FAQs
How do I choose the right chocolate cake mix?
Absolutely! For your Chocolate Cake Pops, you can use any brand of chocolate cake mix that you love. Just make sure it’s about a 15 oz. box. If you’re feeling adventurous, consider trying a chocolate fudge mix for an extra rich flavor!
How should I store my cake pops?
The more the merrier! Store your cake pops in an airtight container in the fridge for up to 7 days. This keeps them fresh and moist. You can also store them at room temperature for up to 2 days, but be mindful that the chocolate coating might soften a bit.
Can I freeze Chocolate Cake Pops?
Yes, you can! Wrap each cake pop individually in plastic wrap, then place them in an airtight container. They’ll stay fresh in the freezer for up to 2 months. Enjoy them directly from the freezer for a cool treat!
Why are my cake pops falling off the sticks?
Very! This can happen if the cake mixture is too moist or not chilled enough before rolling into balls. Ensure your cake is cooled completely before crumbling and combining with frosting. If needed, chill the mixture longer to help it firm up properly before shaping and inserting sticks.
Can pets eat Chocolate Cake Pops?
Please avoid this! Chocolate is toxic to pets like dogs and cats. If you’re considering making these cake pops for your gatherings, ensure they remain out of reach from curious paws, and perhaps keep a special treat for your furry friends nearby!
What can I use if I don’t have cream cheese?
No problem! You can substitute plain cream cheese with mascarpone cheese for a similar creamy texture. Alternatively, if you’re looking for a nondairy option, use coconut cream or any dairy-free cream cheese alternative. Just adjust the sweetness as needed!

Homemade Chocolate Cake Pops that Wow Every Sweet Tooth
Ingredients
Equipment
Method
- Preheat your oven and bake the chocolate cake mix according to the package instructions, using milk instead of water until a toothpick comes out clean.
- Once baked, let the cake cool completely on a wire rack.
- In a bowl, mix softened salted butter, plain cream cheese, vanilla extract, and powdered sugar until creamy and smooth.
- In a large bowl, crumble the cooled cake into fine pieces and mix in about 1 cup of frosting until combined.
- Cover the bowl and chill the cake mixture in the refrigerator for 30-45 minutes.
- Roll the cake mixture into 1.5 tbsp balls and place them on a parchment-lined baking sheet.
- Melt chocolate wafers in a microwave-safe bowl, stirring until smooth.
- Insert sticks into the chilled cake balls, dip each ball in melted chocolate, and add sprinkles if desired.
- Chill the dipped cake pops on the parchment-lined baking sheet for another 30-45 minutes until the chocolate hardens.

