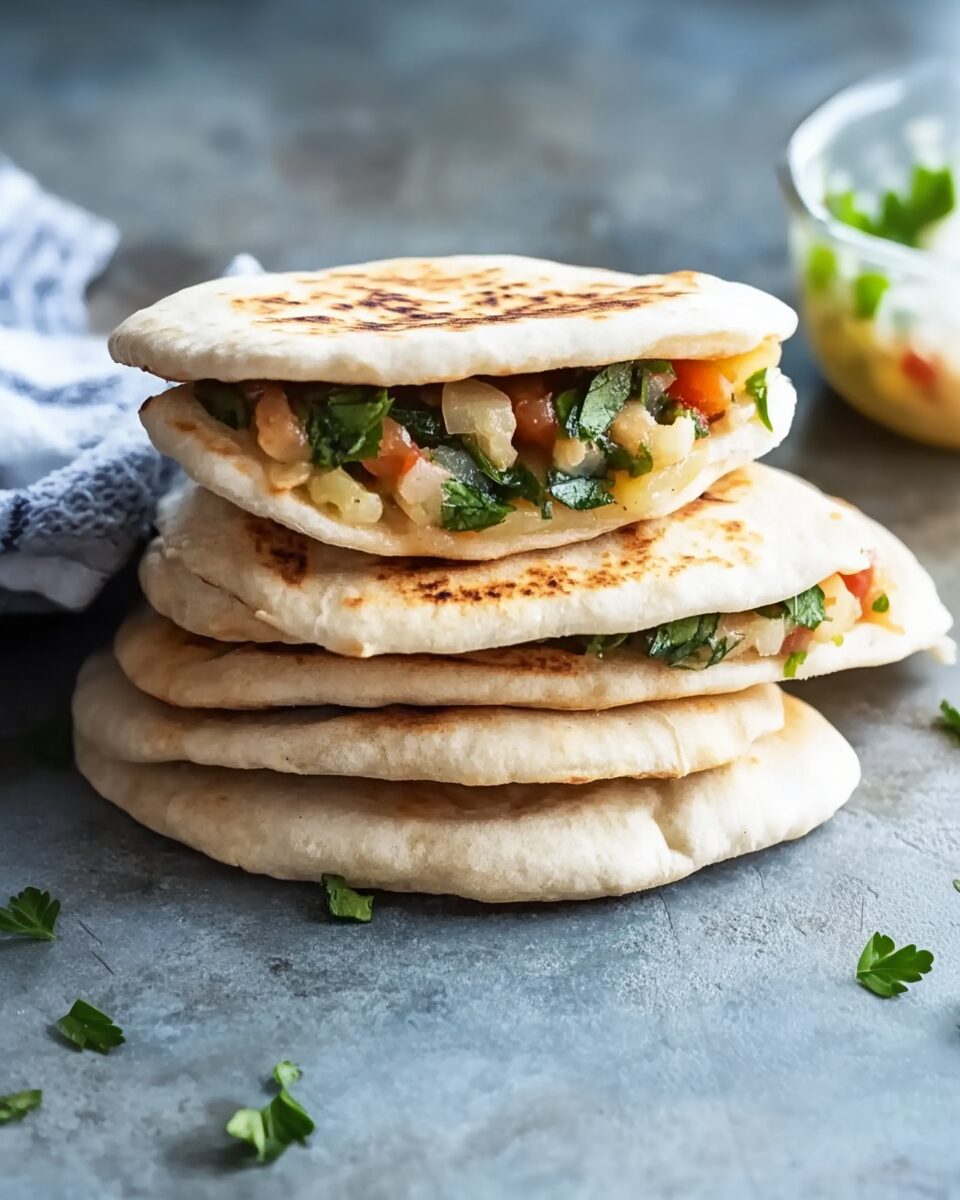
Homemade Pita Bread is a soft, puffy, and flavorful flatbread that surpasses any store-bought version. This recipe incorporates yogurt into the dough, giving the bread a tangy, sourdough-like flavor and an exceptionally tender texture. Perfect for sandwiches, dips, or enjoying on its own, this pita bread is a versatile addition to any meal.
Full Recipe:
Ingredients
- 2 teaspoons active dry yeast
- 1 teaspoon sugar
- 1¼ cups warm water
- 3 cups all-purpose flour
- 1 teaspoon salt
- 1 tablespoon olive oil
- ⅓ cup plain yogurt
Directions
- In a small bowl, combine the yeast, sugar, and warm water. Let it sit for about 5 minutes until foamy.
- In a large mixing bowl or stand mixer, combine the flour and salt. Add the yeast mixture, olive oil, and yogurt. Mix until a dough forms.
- Knead the dough on a floured surface or with a dough hook for about 7–10 minutes until smooth and slightly sticky.
- Place the dough in an oiled bowl, cover, and let it rise in a warm place for about 2 hours, or until doubled in size.
- Punch down the dough and divide it into 12 equal pieces. Roll each piece into a ball, cover, and let them rest for 20 minutes.
- Preheat the oven to 500°F (260°C) and line two baking sheets with parchment paper.
- On a lightly floured surface, roll each dough ball into a ¼ to ½-inch thick circle.
- Place the dough circles on the prepared baking sheets. Bake one sheet at a time for about 5 minutes, or until the pitas are puffy and golden brown.
- Remove from the oven and let cool on a wire rack.
Nutritional Facts (per serving)
Note: Nutritional values are approximate and may vary based on the specific ingredients used.
- Calories: 165
- Total Fat: 0.7g
- Saturated Fat: 0g
- Trans Fat: 0g
- Cholesterol: 0mg
- Sodium: 120mg
- Total Carbohydrates: 29g
- Dietary Fiber: 1.3g
- Sugars: 0.5g
- Protein: 4g
The Origins and Cultural Significance of Pita Bread
Pita bread is believed to have originated in the Middle East, where it has been a staple food for thousands of years. The word “pita” comes from the Greek word “pitta,” which means “flatbread” or “cake.” However, pita bread is not exclusive to Greece; it is popular in many countries across the Middle East, including Lebanon, Turkey, and Syria. The bread has deep cultural and historical roots, often appearing in ancient texts and depictions of daily life in the region.
Historically, pita bread was used as a convenient and versatile food for nomadic peoples who needed portable and easy-to-make sustenance. The bread was typically baked in clay ovens, which produced the signature puffed pocket inside. Over time, pita bread evolved and became a key component of meals in the Mediterranean and the Middle East. It was often paired with dips, such as hummus and baba ghanoush, and used as a vessel to scoop up stews, salads, and meats.
Why Make Homemade Pita Bread?
While pre-made pita bread is available in supermarkets, there are several advantages to making it from scratch. The most obvious benefit is the freshness. Homemade pita bread comes straight out of the oven, soft, warm, and perfect for any meal. There’s also the added satisfaction of knowing exactly what ingredients go into the bread, without preservatives or additives. Additionally, making pita bread at home allows you to control the texture and flavor to your liking. You can experiment with different types of flour, add extra seasonings, or adjust the thickness of the dough for different results.
The Role of Ingredients in Pita Bread
Each ingredient in pita bread plays an essential role in contributing to its texture, flavor, and overall success. The key ingredients in pita bread include flour, yeast, water, salt, and a small amount of oil. Here’s a closer look at how each ingredient impacts the final product:
Flour
The primary ingredient in pita bread is flour, which gives the bread structure and elasticity. Most recipes call for all-purpose flour, but you can experiment with different types of flour to achieve varying textures and flavors. For a softer, lighter pita, you may prefer to use a combination of all-purpose and whole wheat flours. Whole wheat flour adds a nuttier flavor and a denser texture, which some people prefer.
Yeast
Yeast is responsible for the rise in the bread, causing the dough to puff up and form the signature pocket inside. Active dry yeast is commonly used in pita bread recipes, and it is crucial to activate the yeast by dissolving it in warm water with a bit of sugar. This process helps to kickstart the fermentation and allows the dough to rise properly.
Water
Water is the key ingredient in creating the dough. It hydrates the flour, activates the yeast, and forms the dough’s texture. The temperature of the water is important – it should be warm but not too hot, as excessive heat can kill the yeast. Lukewarm water helps the yeast to grow and develop the dough’s structure.
Salt
Salt enhances the flavor of the bread and helps to regulate the fermentation process. While the bread is still rising, salt controls the rate at which yeast works, preventing the dough from becoming too gassy or over-fermented. Salt also strengthens the gluten network, which gives the dough its chewy and soft texture.
Oil
Olive oil or vegetable oil is often added to the dough to improve the texture and softness of the pita. Oil contributes to the bread’s tenderness and helps to prevent it from drying out during baking. It also adds a subtle flavor that complements the mild yeastiness of the dough.
Techniques for Perfect Pita Bread
There are a few essential techniques that help ensure your homemade pita bread turns out perfectly each time. These include proper kneading, allowing the dough to rise fully, and baking the bread in a hot oven to achieve the characteristic puff.
Kneading
Kneading is a crucial step in developing the dough’s texture. The dough should be kneaded until it is smooth and elastic, which helps build the gluten network necessary for a chewy bread. The kneading process also helps to incorporate air into the dough, which contributes to the puffiness of the pita.
Resting and Rising
After kneading, the dough must be allowed to rise for at least an hour or until it has doubled in size. This resting period allows the yeast to work and develop the dough’s structure. It’s essential to let the dough rise in a warm, draft-free place to achieve the best results.
Baking at High Heat
Pita bread needs to be baked at a high temperature, typically around 500°F (260°C), to create the signature puff. The high heat causes the water in the dough to vaporize quickly, creating steam that inflates the dough and forms the pocket. It’s crucial to bake the bread for a short amount of time to prevent it from becoming overly crispy or dry. The result should be a soft, fluffy pita with a slight golden color on the outside.
Serving and Storing Pita Bread
Once your pita bread has cooled slightly, it is ready to be served. The bread can be used for a variety of dishes, from wraps and sandwiches to pizzas and dips. Pita bread is especially popular for serving with hummus, tzatziki, or baba ghanoush, making it a perfect addition to mezze platters.
Conclusion
Homemade pita bread is a delightful and rewarding recipe that brings the taste of the Mediterranean right to your kitchen. With just a few simple ingredients and techniques, you can create soft, puffy bread that is perfect for a variety of dishes.


